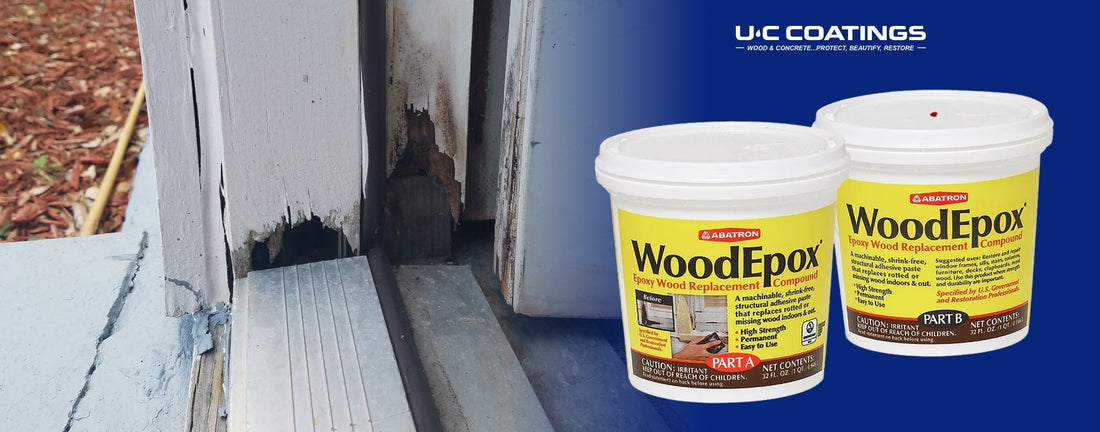
Ever stared at a piece of damaged wood and wondered if you could bring it back to life? Whether you're new to wood repair or you've heard about U-C Coatings but want to dive deeper into professional techniques, you're not alone. Wood filler can work absolute miracles on damaged surfaces, but only when you avoid the common pitfalls that trip up even experienced DIYers.
The truth is, most wood filler failures aren't because of bad products. They happen because of easily avoidable mistakes that can turn a simple repair into a frustrating nightmare. Today, we're going to walk through the five biggest mistakes people make with wood filler, and show you how to get professional results every time.
Mistake #1: Skipping Proper Surface Preparation
This is the big one. If we had to pick just one mistake that destroys more wood repairs than anything else, it would be rushing the prep work. You know that feeling when you're excited to start the actual repair? That's exactly when you need to slow down.
What happens when you skip proper preparation: The filler won't bond properly, creating weak spots that crack or fall out later. You'll end up redoing the entire repair within months.
Here's what proper preparation looks like:
- Remove all loose debris, dirt, and old paint
- Sand rough areas to create a good bonding surface
- Make sure the wood is completely dry before applying filler
Do you need to remove all the rotten wood before applying epoxy filler? Not necessarily all of it, but you must remove any soft, punky wood that won't provide structural support. Solid, sound wood can stay. The key is ensuring whatever remains can actually hold the filler.
Critical step: If the wood feels soft or spongy, you need to treat it with a wood hardener like LiquidWood® first. This soaks in and firms up the wood fibers before you apply the filler. Even if all of the remaining wood feels solid, using LiquidWood acts as an excellent bonding agent for WoodEpox, and adds flexibility to the overall repair.
Mistake #2: Choosing the Wrong Product for Your Job
Walk into any hardware store and you'll see dozens of wood fillers. Each one serves a different purpose, and using the wrong type guarantees frustration.
For serious repairs that need to last, WoodEpox® stands out as a high-performance solution. Unlike basic fillers that shrink and crack, this epoxy wood filler bonds permanently to wood, concrete, and other surfaces. It's weather-resistant, which means it works just as well on outdoor projects as indoor ones.
When to choose WoodEpox®:
- Structural repairs on windows, doors, and frames
- Outdoor projects exposed to weather
- Areas that need drilling, sanding, or routing later
- Repairs requiring multiple coats or complex shapes
The beauty of WoodEpox® lies in its versatility. You can use it on vertical surfaces without it sagging, and it won't shrink as it cures, eliminating those annoying dips, cracks, or separations that show up weeks later.
Mistake #3: Poor Mixing and Application Technique
Epoxy fillers require precise mixing, and this is where many people stumble. WoodEpox® uses a simple 1:1 ratio, but "simple" doesn't mean careless.
Common mixing mistakes:
- Not measuring equal parts accurately
- Incomplete mixing that leaves streaks
- Working too slowly and letting the mixture start hardening
You have about 20 minutes of working time, so plan your approach before you start mixing. WoodEpox is the consistency of a light-weight spackling compound so it’s easy to form and shape as it’s applied. You can rebuild fairly large sections all at once, or apply it in layers before the first layer has hardened.
Mistake #4: Ignoring Drying and Curing Times
Patience isn't just a virtue with wood filler; it's a requirement. WoodEpox® hardens in just a few hours, but that doesn't mean it's ready for heavy sanding or finishing.
The smart approach:
- Wait for complete hardening before sanding
- Test a small area before applying finish
- Plan your project timeline around curing, not just application
Rushing this step leads to gummy sandpaper, torn surfaces, and repairs that fail under stress. Give it the time it needs, and you'll get results that last for years. If a faster cure is required you can speed up the curing process using heat.
Mistake #5: Inadequate Sealing and Finishing
Even the best wood repair looks amateur without proper finishing. This final step protects your repair and makes it invisible.
WoodEpox® accepts stains, paints, and clear finishes beautifully, but surface preparation matters here too. Sand progressively from coarse to fine grits, clean off all dust, and apply your finish in thin, even coats.
For outdoor applications, sealing becomes critical. While WoodEpox® resists weather naturally, a quality topcoat adds extra protection and helps everything blend seamlessly.
The Bottom Line
Wood repair doesn't have to be complicated, but it does require doing things in the right order with the right materials. Remember, good surface preparation and paying attention to the directions are the best way to guarantee good results. Clean thoroughly, choose the right filler for your specific job, mix carefully, be patient with curing times, and finish properly.
Ready to tackle your next wood repair project with confidence? Explore WoodEpox® and discover why professionals trust it for their most challenging restoration jobs.


